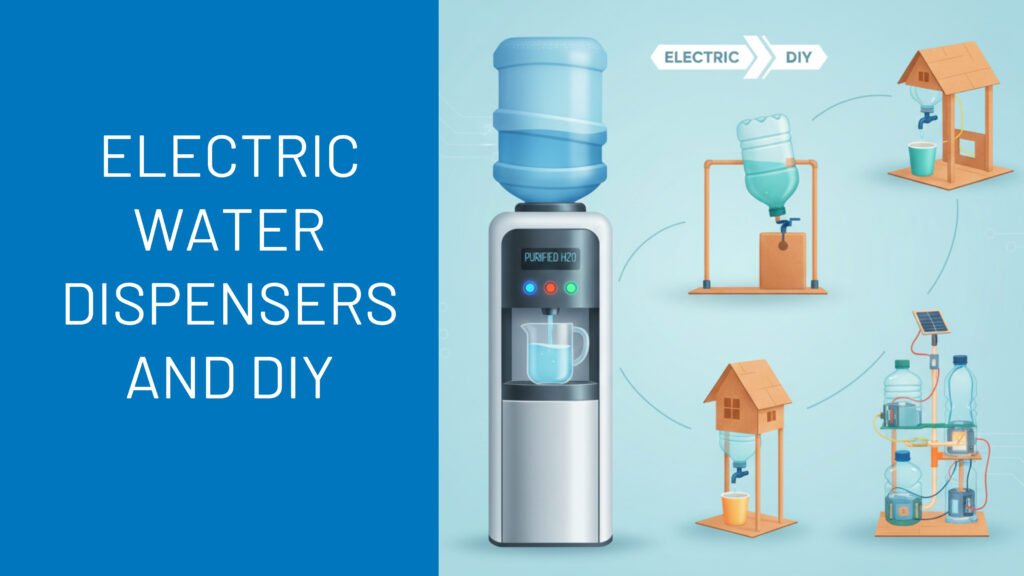
Whether you’re a student working on a science fair project or someone looking to create a practical water dispensing solution, building your own water dispenser can be both educational and rewarding. While electric water dispensers offer convenience and advanced features, understanding how to create manual versions helps us appreciate the engineering principles behind modern appliances. Let’s explore various DIY water dispenser projects, from basic school models to more sophisticated designs.
Water Dispenser Project for School
Creating a water dispenser project for school is an excellent way to learn about gravity, fluid dynamics, and basic engineering. The simplest version requires just a few materials and demonstrates how commercial electric water dispensers work.
Materials Needed:
- One 2-liter plastic bottle
- Small plastic tap or spigot valve
- Hot glue gun or strong waterproof adhesive
- Scissors or craft knife
- Cardboard or wooden base
- Marker for marking
Step-by-Step Instructions:
First, thoroughly clean and dry your plastic bottle. Using your marker, mark a spot about 2-3 inches from the bottom of the bottle where you’ll attach the tap. Carefully cut or drill a hole slightly smaller than your tap’s threading. Insert the tap through the hole from the outside, ensuring a tight fit. Apply hot glue or waterproof adhesive around the connection, both inside and outside the bottle, to prevent leaks. Let it dry completely for at least 2 hours.
Create a stable base using cardboard or wood that can support the bottle upright. You can decorate the base and bottle to make your project more visually appealing. Fill the bottle with water and test for leaks. Place a cup or container under the tap and open it to dispense water.
This project teaches students how gravity creates pressure that pushes water through the tap, the same principle used in many commercial dispensers before electric water dispensers became popular. For your presentation, explain how the height of water creates pressure, and how this pressure decreases as the water level drops.
How to Make a Water Dispenser with Plastic Bottle
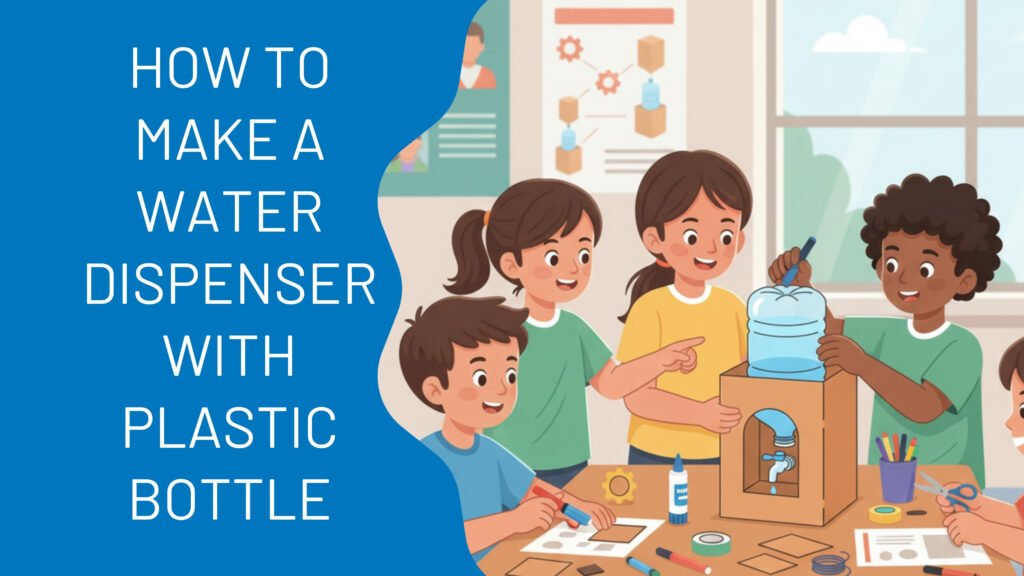
Building a functional water dispenser with plastic bottle is surprisingly straightforward and practical for home use, camping, or outdoor events. Here’s an advanced two-bottle design that prevents spills.
Materials Needed:
- Two identical plastic bottles (1.5 to 2 liters)
- One tap valve
- Sharp scissors or utility knife
- Hot glue gun
- Drill or heated nail (for making holes)
- Stand or mounting bracket
Construction Method:
Take your first bottle and cut off the bottom approximately 2 inches from the base, creating a funnel. This will be your top reservoir. In the second bottle (which remains intact), create a hole near the bottom and securely attach your tap valve using the same method described above. Ensure absolutely no leaks by testing with water and reapplying adhesive if needed.
Now here’s the clever part: invert the cut bottle (funnel) and insert its neck into the mouth of the intact bottle. You may need to slightly trim the funnel’s neck to achieve a snug but not sealed fit. When you fill the top funnel with water, it creates an air-lock system. Water only flows down when you open the tap, which allows air to bubble up through the connection, releasing the vacuum.
This design is particularly useful because it prevents spills and demonstrates the principle of air pressure, showing how electric water dispensers control flow using similar concepts combined with electronic valves. Mount your complete dispenser on a wall bracket or stable stand for convenience.
Water Dispenser DIY
A comprehensive water dispenser DIY project can be customized for various needs. Here’s a more sophisticated build that looks professional and functions reliably.
Materials Needed:
- 5-gallon water bottle or large container
- Quality brass or plastic tap valve
- PVC pipe stand or wooden frame
- Drip tray (can be made from plastic container lid)
- Decorative contact paper or paint
- Mounting hardware
Building Process:
Design a frame that holds your water bottle securely at a comfortable dispensing height (usually 3-4 feet from the ground). Use PVC pipes connected with elbow joints for a modern look, or construct a wooden cabinet-style frame for a more traditional appearance. Ensure the structure is stable and can support the weight of a full water bottle.
Install the tap valve into your bottle cap or at the bottle’s base. For a cleaner look, drill through the bottle cap and extend a tube down into the water with the tap valve mounted externally. This keeps the tap at a consistent height regardless of water level.
Create or mount a drip tray beneath the tap to catch spills. Add a cup holder on the side for convenience. Paint or cover your frame to match your décor. This DIY approach gives you the functionality of commercial electric water dispensers without the electrical components.
Automatic Water Dispenser Project
An automatic water dispenser project that activates without manually turning a tap represents a step up in complexity. You can create a touch-free system using basic materials or simple electronics.
Mechanical Automatic Dispenser (No Electricity)
Materials Needed:
- Plastic bottle with tap
- Wooden paddle or plastic plate
- Spring mechanism
- Wooden or metal frame
- Screws and hinges
Assembly Instructions:
Mount your bottle on an elevated stand. Create a lever mechanism where a paddle or plate sits directly under the dispensing spout. When you press a cup against the paddle, it pushes up against a valve or pushes down on the tap handle (depending on your design). Attach a spring to the mechanism so it returns to the closed position when the cup is removed.
The key is adjusting the spring tension—tight enough to close completely but light enough that a cup easily activates it. This mimics the push-button system on many electric water dispensers but operates purely through mechanical advantage.
Electronic Automatic Dispenser
Materials Needed:
- Small 12V water pump (aquarium pump)
- Infrared proximity sensor or push button
- 9V or 12V battery pack
- Connecting wires
- Water reservoir
- Tubing
Wiring and Setup:
Connect the water pump to the battery pack through the sensor or button. Wire the positive terminal of the battery to one side of the sensor/button, the other side to the pump’s positive wire, and the pump’s negative wire back to the battery’s negative terminal. When the sensor detects an object or the button is pressed, it completes the circuit and activates the pump.
Place the pump’s inlet tube in your water reservoir and the outlet at your dispensing point. For the infrared sensor version, position it so a cup placed under the spout triggers water flow automatically. This creates a truly hands-free experience similar to modern electric water dispensers and introduces students to basic circuits, sensors, and automation.
How to Make a Water Dispenser Without Electricity
Non-electric water dispensers are practical, eco-friendly, and perfect for areas without reliable power. Here are several effective designs:
Gravity-Fed Dispenser
This is the simplest non-electric option. Mount your water container on a high shelf or wall bracket, attach a tap valve, and let gravity do the work. The higher the water source, the stronger the flow pressure.
Pump-Action Dispenser
Materials Needed:
- Large water container with sealed lid
- Hand pump (similar to soap dispensers)
- Two grommets for lid penetrations
- Intake tube
- Output tube with valve
- Silicone sealant
Construction:
Drill two holes in your container’s lid—one for the intake tube (connected to the pump) and one for the output tube. The intake tube should reach nearly to the bottom of the container. Seal around both tubes with silicone. Mount the hand pump to the lid. Connect the output tube to a tap valve at the side of your container.
When you pump the handle, it pressurizes the container, forcing water out through the output valve. This design is similar to camping water jugs and shows the pressure principles that electric water dispensers automate with motors. The beauty of this system is that it maintains consistent pressure regardless of water level.
Siphon-Based Dispenser
Place your water source on a high shelf (at least 3-4 feet up) and run flexible tubing down to a tap valve at a lower level. To start the siphon, fill the tube completely with water (suck on the outlet end or use a syringe to fill it), then quickly close the tap. Once started, the siphon continues flowing whenever you open the tap, until the source is empty. This completely passive system requires no electricity or manual pumping and provides consistent flow.
How to Make Water Dispenser with Cardboard

Cardboard water dispensers are excellent for temporary use, demonstrations, or understanding structural design. While they won’t hold water directly, they can house and support a water-holding container.
Materials Needed:
- Thick corrugated cardboard (appliance boxes work great)
- Plastic bottle for actual water storage
- Tap valve
- Box cutter or scissors
- Hot glue gun
- Ruler and pencil
- Clear packing tape or plastic sheeting
- Decorative paper or paint
Step-by-Step Construction:
First, design your dispenser on paper. Plan for a main body that will house the water bottle, a dispensing area at the front, and a drip tray at the bottom. A typical design might be 12 inches wide, 8 inches deep, and 20 inches tall.
Cut your cardboard pieces: front, back, two sides, top, and bottom panels. Also cut internal supports that will hold the water bottle. For strength, create double-layer panels by gluing two pieces of cardboard together with the corrugation running in opposite directions.
Assemble the basic box structure using hot glue along all edges. Create an opening in the front panel where the tap will protrude. Cut a circular opening in the top panel sized to hold your water bottle upside down (the bottle neck should fit through snugly).
Reinforce all stress points and corners with additional cardboard strips glued on the inside. Create a drip tray by cutting a rectangular piece of cardboard and folding up the edges, then covering it completely with packing tape to make it water-resistant.
Waterproof the areas that might get wet (around the bottle opening and tap area) with clear packing tape or glue on plastic sheeting. Install your water bottle with the attached tap. Decorate the exterior with contact paper, paint, or decorative paper.
This structure creates a professional-looking dispenser that’s perfect for understanding product design. While not as durable as electric water dispensers, it demonstrates how form follows function in appliance design and teaches valuable skills in planning, measuring, and construction.
Automatic Water Dispenser Model
Building a working scale automatic water dispenser model helps explain how modern electric water dispensers function. This project is perfect for science fairs or technology demonstrations.
Materials for Basic Model:
- Small DC water pump (6-12V, available at electronics stores)
- Small plastic container for water reservoir
- Push button switch or infrared sensor module
- Battery pack (matching pump voltage)
- Connecting wires and wire strippers
- Small plastic cup or container for dispensing area
- Cardboard or plastic for frame
- LED light (optional, for visual indicator)
Building the Basic Automated Model:
Create a base platform from sturdy cardboard or thin plywood. Mount your water reservoir (a small plastic container) at the back. Install the water pump with its inlet submerged in the reservoir. Attach a tube to the pump outlet and position it over your dispensing area.
Wire the circuit: Connect the battery positive terminal to one terminal of your push button or sensor. Connect the button’s other terminal to the pump’s positive wire. Connect the pump’s negative wire to the battery’s negative terminal. When the button is pressed, the circuit completes and the pump activates.
For added sophistication, incorporate an infrared proximity sensor instead of a button. These sensors (like the HC-SR04 ultrasonic sensor or a simple IR sensor module) can detect when a cup is placed beneath the spout. You may need a small transistor or relay to handle the pump’s current, depending on your sensor’s output capacity.
Advanced Features:
Add an LED indicator that lights up when water is dispensing. Include a water level indicator using a clear container and marked levels. Create a professional-looking housing using cardboard, plastic, or wood. Add a drip tray that you can remove and clean.
This model demonstrates how electric water dispensers automate the dispensing process using sensors, pumps, and electronic controls. It’s an excellent way to learn about circuits, sensors, fluid dynamics, and automation—all principles used in commercial appliances.
How to Make Water Dispenser Without Bottle
Bottle-free water dispensers connect directly to a water source, eliminating the need for heavy bottle replacement. While commercial versions use complex plumbing, you can create simplified models.
Gravity-Fed Tank System
Materials Needed:
- Large food-safe container with lid (3-5 gallon bucket)
- Tap valve
- Mounting frame or shelf
- Flexible food-grade tubing
- Drip tray
Construction:
Mount your container on a high shelf or create a wall-mounted bracket system. Install a tap valve near the bottom of the container. The key advantage over bottle systems is that you can refill this from the top without removing anything—just lift the lid and pour water in.
For a more sophisticated setup, drill a hole in the lid and install a funnel or fill tube. This allows you to refill the dispenser from a pitcher or directly from your tap using a hose, simulating how office electric water dispensers with direct plumbing connections operate.
Pumped Reservoir System
Materials Needed:
- Lower reservoir (large container)
- Water pump (12V or AC powered)
- Switch or sensor
- Dispensing valve at counter height
- Power supply
- Tubing
Assembly:
Place your large reservoir on the floor or in a cabinet beneath your counter. Install a water pump in or near the reservoir with the inlet tube reaching to the bottom. Run the outlet tube up to counter height where you’ll install a dispensing valve. Wire the pump to a switch or automatic sensor.
When activated, the pump draws water from the lower reservoir and pushes it up to the dispensing point. This system truly mimics bottleless electric water dispensers and can be expanded to include filtration, hot water heating elements (if you’re comfortable with proper electrical safety measures), and even cold water cooling using a small refrigeration unit.
Safety Considerations for Heated Systems:
If adding hot water capability, use a properly rated immersion heater with a thermostat (set to 85-95°C for hot water). Include a thermal cutoff switch that disconnects power if temperature exceeds safe limits. Use heat-resistant tubing and mounting materials. Clearly label hot water outlets. Consider consulting an electrician for any mains-powered heating elements.
Direct Connection System (Advanced)
For a permanent installation, you can connect your dispenser directly to household plumbing. This requires basic plumbing skills and may need permits depending on your location.
Install a T-connector on a cold water line with a shut-off valve. Run food-grade tubing from this connection to your dispenser location. Install a dispensing valve that can handle line pressure, or include a pressure regulator if your home water pressure is high. Add a filter if desired for improved water quality.
This setup provides unlimited water without refilling, just like commercial bottleless electric water dispensers. You can then add optional features like cooling, heating, or filtration systems.
From DIY to Electric: Understanding the Evolution
Creating these DIY projects helps us appreciate what makes modern electric water dispensers so convenient. They automate the pumping process, maintain water temperature through heating and cooling systems, include multi-stage filtration, and offer both hot and cold water at the touch of a button.
The pressure control, temperature regulation, and consistent flow that electric models provide come from sophisticated engineering that builds on the simple principles demonstrated in these projects. Commercial electric water dispensers also include safety features like child locks on hot water, overflow protection, and energy-efficient heating elements that maintain temperature with minimal power consumption.
Whether you’re building a school project to understand basic physics or creating a functional dispenser for practical use, these DIY approaches teach valuable lessons about fluid dynamics, pressure, mechanics, and engineering design. While nothing beats the convenience of a quality electric water dispenser for daily use, knowing how to create alternatives gives you both practical skills and a deeper appreciation for the technology we often take for granted.
Why Choose Professional Electric Water Dispensers for Daily Use
While DIY projects are excellent for learning and temporary solutions, professional electric water dispensers offer unmatched benefits for homes and offices in Bangalore:
Advanced Features:
- Instant hot water (85-95°C) for tea, coffee, and instant meals
- Chilled cold water (4-10°C) for refreshing drinks
- Automatic temperature maintenance with minimal energy consumption
- Multi-stage filtration in advanced models
- Touchless dispensing for enhanced hygiene
- Child safety locks to prevent accidents
- Energy-efficient operation with smart sensors
Premium Brands Available:
At Bangalore Aqua, we offer top-quality electric water dispensers from trusted brands:
- Blue Star Electric Water Dispensers: Premium quality with advanced cooling technology
- Voltas Electric Water Dispensers: Reliable performance and innovative designs
- Kent Electric Water Dispensers: Built-in purification systems
- Livpure Electric Water Dispensers: Budget-friendly with excellent features
Benefits of Buying from Authorized Dealers:
When you choose Bangalore Aqua for your electric water dispenser needs:
100% Genuine Products: Factory-authorized with valid warranties Expert Guidance: Professional recommendations based on your requirements Professional Installation: Trained technicians ensure proper setup After-Sales Support: Prompt service and genuine spare parts Competitive Pricing: Best deals on premium electric water dispensers Wide Selection: Models for homes, offices, and commercial use
Safety and Best Practices
Remember these important guidelines for DIY projects:
- Always use food-safe, BPA-free materials for parts that contact drinking water
- Ensure all connections are secure and leak-proof to prevent water damage
- Test thoroughly with water before regular use
- Clean and sanitize your dispenser regularly to prevent bacterial growth
- Supervise children during construction when using sharp tools, hot glue, or electrical components
- If adding electrical components, ensure proper insulation and water-resistant connections
- For heated water systems, include proper safety cutoffs and temperature controls
- Replace water regularly and don’t let it sit for more than a few days
- Check seals and connections periodically for wear
Conclusion: Learning Through Building
With these comprehensive guides, you can build water dispensers ranging from simple school projects to functional home appliances. Each project teaches important principles while creating something useful, and ultimately helps you understand the convenience and engineering excellence behind modern electric water dispensers.
For Students and Educators:
These DIY projects offer hands-on learning about:
- Physics and fluid dynamics
- Engineering principles
- Problem-solving skills
- Circuit design and automation
- Sustainable solutions
For Home and Office Use:
When you’re ready to upgrade from DIY experiments to professional solutions, Bangalore Aqua is your trusted partner for electric water dispensers in Bangalore.
Why Settle for Manual When You Can Have Automatic?
Professional electric water dispensers provide:
- Consistent hot and cold water 24/7
- No manual pumping or lifting heavy bottles
- Enhanced safety with built-in protections
- Energy-efficient operation
- Stylish designs that complement modern spaces
- Long-lasting durability with 5-10 year lifespans
Ready to Experience the Convenience of Electric Water Dispensers?
For DIY Enthusiasts: Use these guides to build amazing water dispenser projects and understand the engineering behind modern appliances!
For Home & Office Use: Visit Bangalore Aqua for premium electric water dispensers from top brands like Blue Star, Voltas, Kent, and more!
Contact Bangalore Aqua Today:
📍 Your Trusted Partner for Electric Water Dispensers in Bangalore
🌐 Visit Us Online: https://bangaloreaqua.com/
💧 Explore our complete range of electric water dispensers 🛠️ Professional installation and service ✨ Competitive prices with manufacturer warranty 📞 Expert consultation for the perfect dispenser
Whether you’re building a school project or upgrading to a professional electric water dispenser, we’re here to help!
Stay curious, keep learning, and stay hydrated with the perfect water dispensing solution!